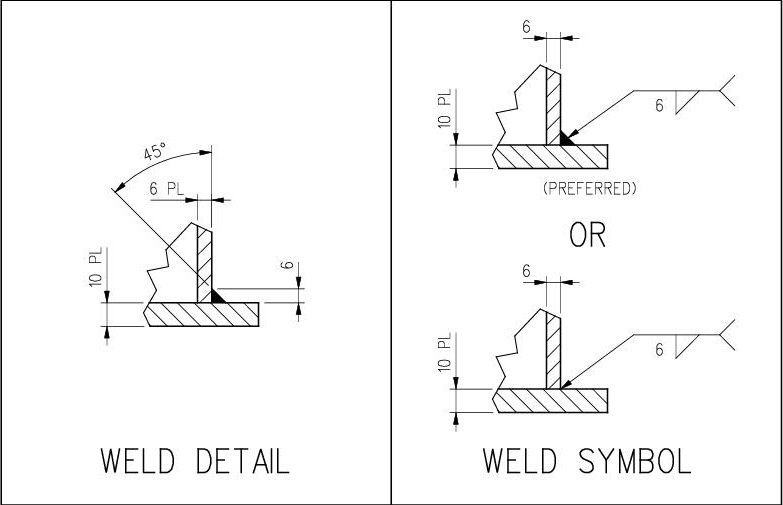
When dimensioning a weld, instructions are given to the manufacturer of how the preparation should be done for the specific weld area. The weld detail on the drawing should convey all the information necessary for this preparation.
Some companies does not require weld details and only require weld symbols for the identification of welds, where others may require complete weld details.
Some joints are very simple and do not require a lot of preparation, where others can be very complicated and a lot of information needs to be conveyed.
Certain welds are also governed by rules stated in the design code and the detail must reflect such rules for the weld to be code compliant.
Below are the most common weld detail definitions.

Below is an example of a simple fillet weld between two plates. The weld can also be shown as a detail or with a weld symbol.

A butt weld of thicker material may require a detail or weld symbol. If the material is very thick, a double prep (weld prep from both sides) may be used to minimise heat input. Different companies may have a different thickness threshold for when a single V prep is no longer sufficient and a double V prep is required. Below is an example of a single V prep. The weld can be shown as a detail or with a weld symbol.

From these examples, you should be able to get the basics of what needs to be detailed, thus adding more complexity to a weld is just applying the same principles to every section of the weld.

